Installing the Sentry Gate Opener is a straightforward process when done with careful planning and the right tools. This guide has been created to assist installers, whether professionals or do-it-yourselfers, to install their Sentry Gate Opener system correctly. It contains detailed steps derived from the manufacturer’s installation manual, along with essential safety precautions, a checklist of necessary tools and parts, and best practices to ensure a smooth and secure setup.
Tools Required for Installation
Before beginning the installation, gather the following tools:
- Wrenches: 7/16", 9/16", and 10mm
- Sockets: 7/16", 3/8", and 5/16"
- Drill
- Drill bits: 1/4" and 3/8"
- Drill adapter for socket attachment
- Pliers
- Hack saw
- Level and tape measure
These tools are required for nearly every part of the installation, from mounting brackets to adjusting the actuator. It is highly recommended that you do not perform any welding while the actuator is plugged in or while the battery is connected, as this could cause serious damage to the control board or the battery. Welding is the most secure mounting option, though bolt-on brackets are provided and acceptable when installed tightly with proper hardware. Lag bolts should be avoided as they do not offer sufficient long-term stability.
Sentry Gate Opener Kits
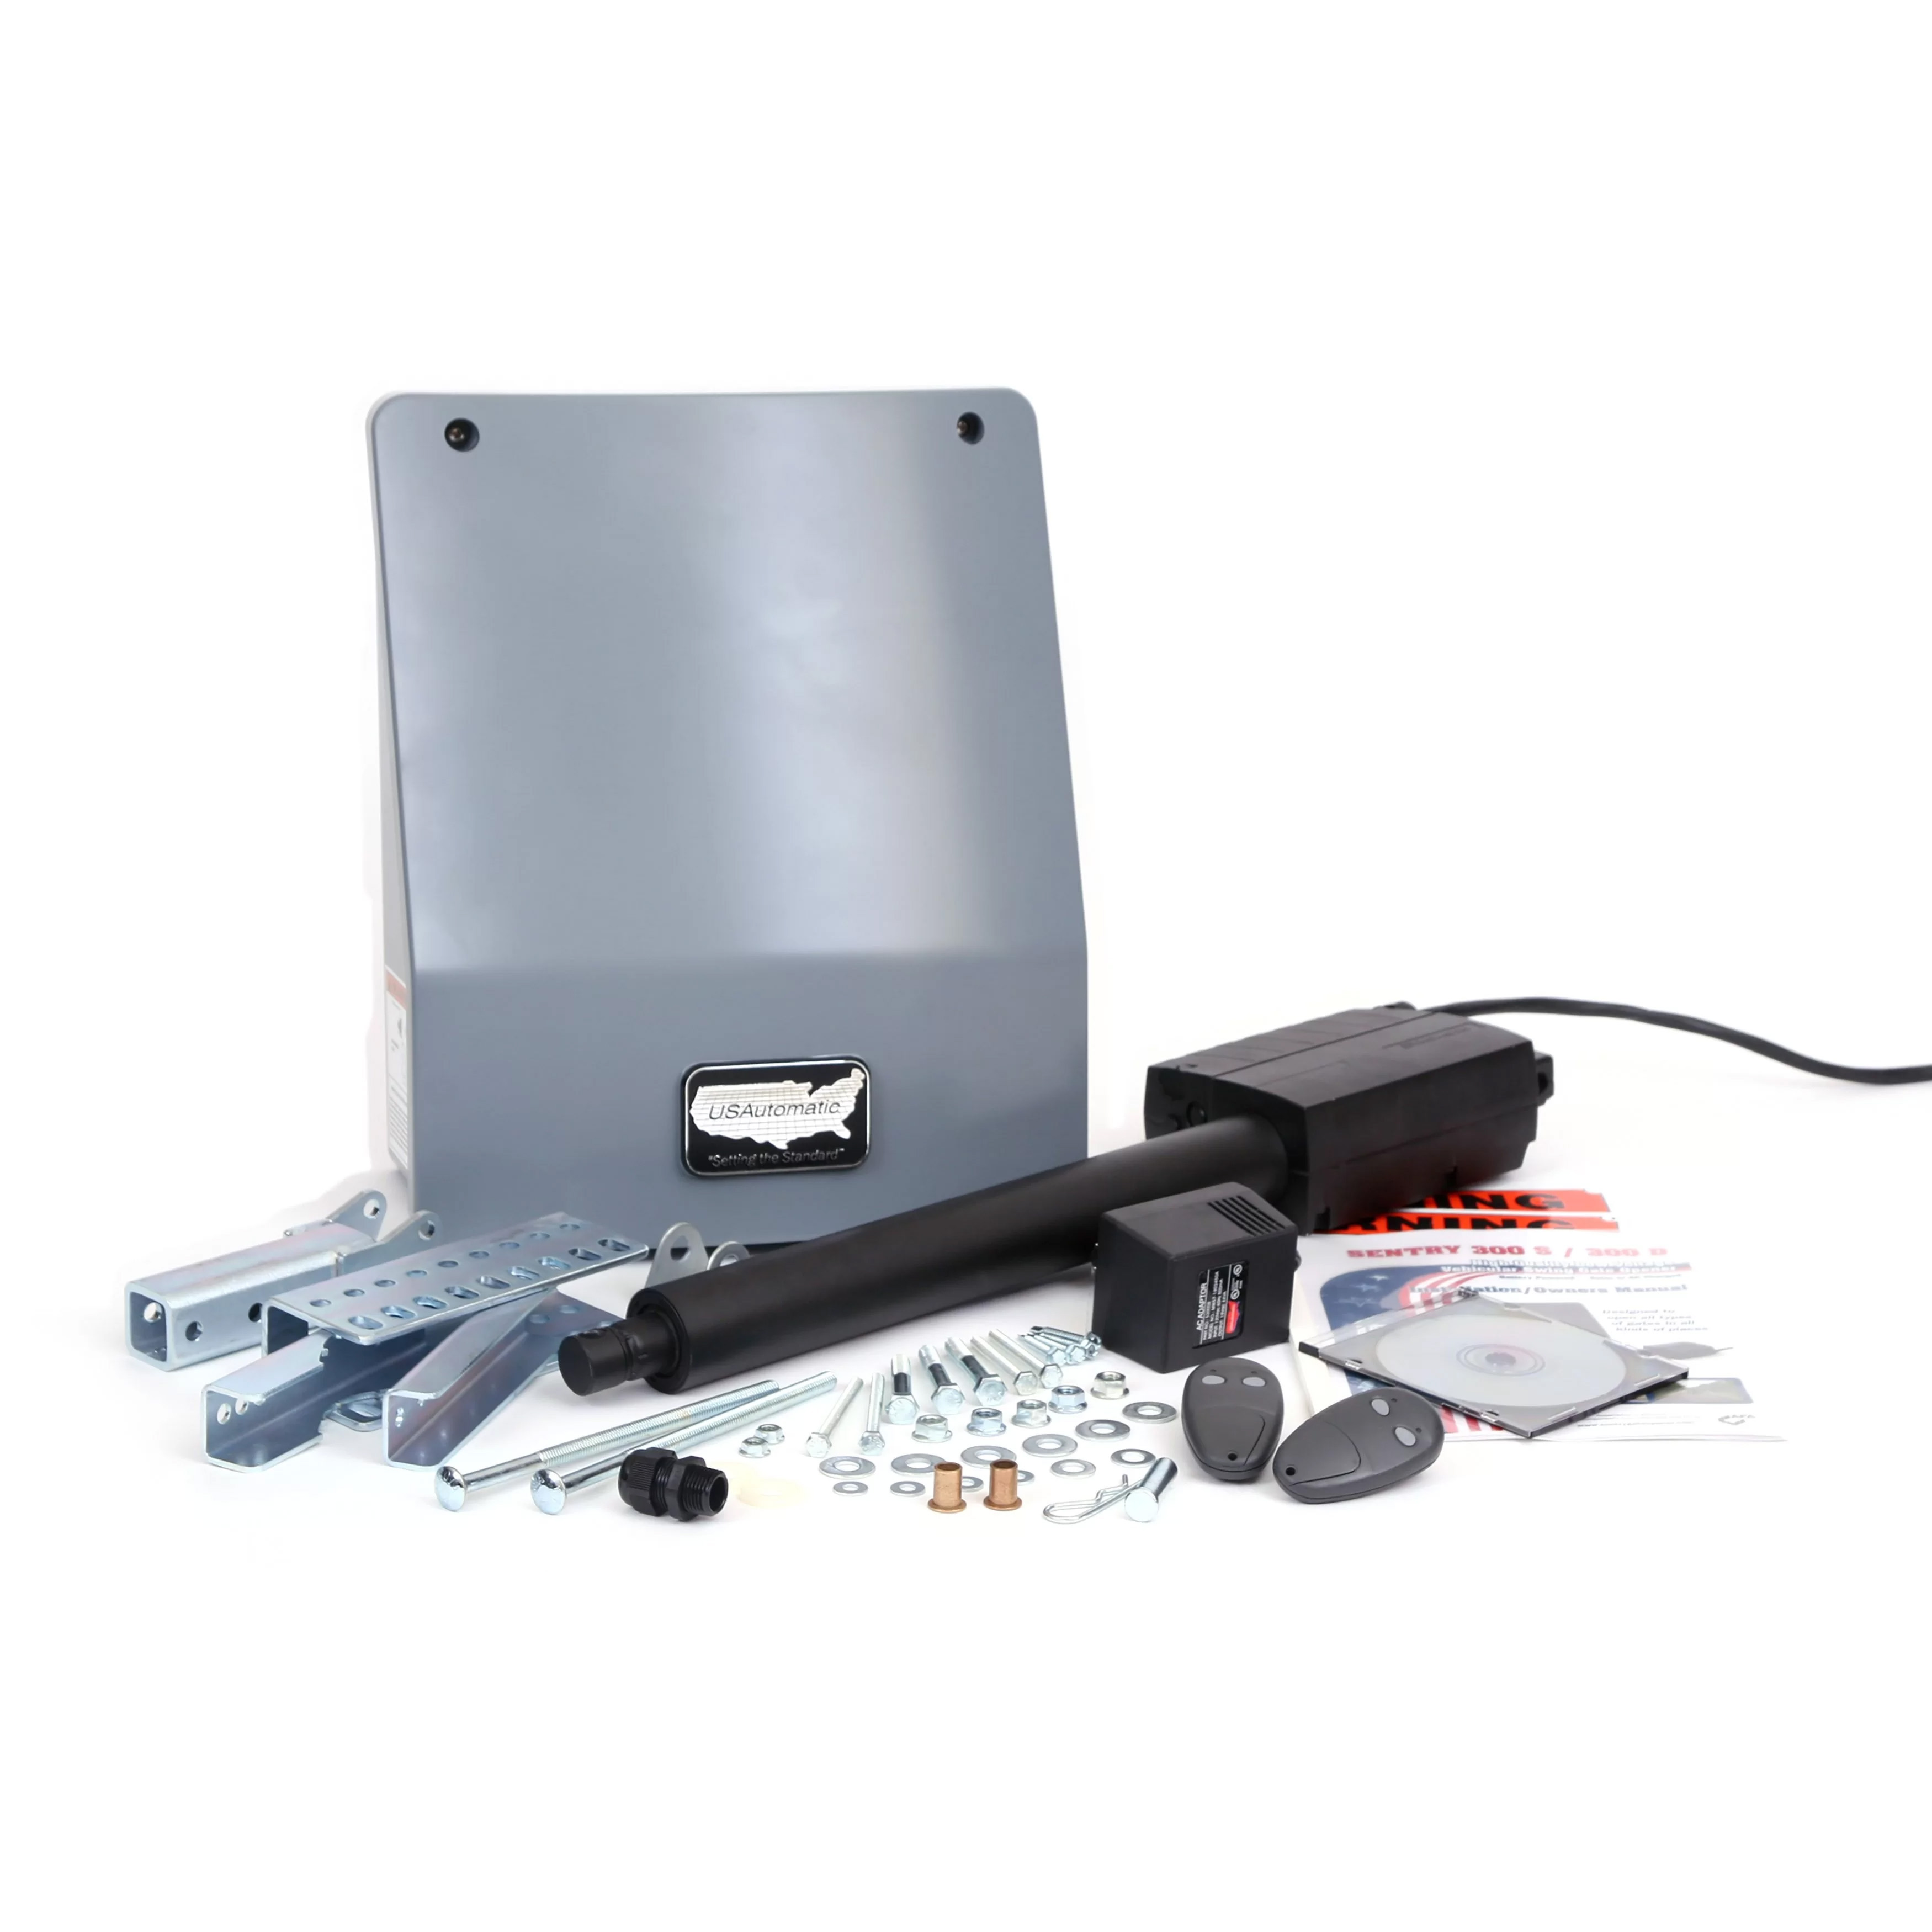
Sentry 300S Swing Gate Operator with Photo Eye Kit (120320)
The Sentry 300S is a reliable, solar-compatible swing gate operator designed for residential, ranch, and light commercial applications. This complete kit includes a safety photo eye for enhanced protection and meets UL325 standards. Known for easy installation and dependable performance, the Sentry 300S is ideal for single swing gates and operates with both AC and solar power systems.
Key Features:
- Complete swing gate operator kit with photo eye
- Compatible with solar and AC power sources
- Designed for single swing gates up to 20 feet or 800 pounds
- Includes Sentry control board, actuator, and hardware
- Photo eye sensor for enhanced safety
- Plug-and-play wiring for fast, easy installation
- Battery-powered system for continuous operation during outages
- Meets UL325 safety standards
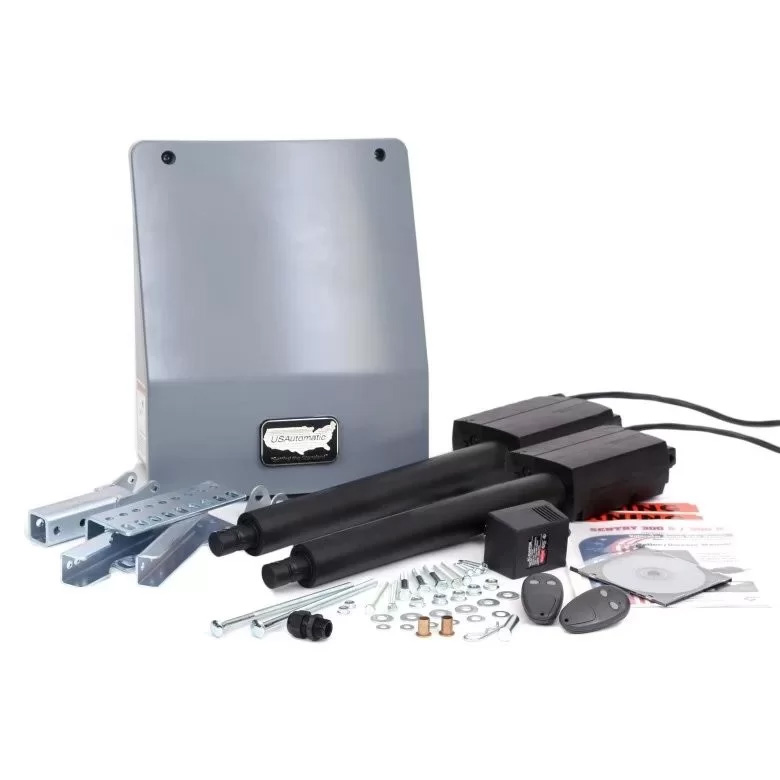
Sentry 300D Dual Swing Gate Operator with Photo Eye Kit (120323)
The Sentry 300D is a dependable dual swing gate operator system designed for residential, ranch, and light commercial applications. This kit includes everything needed to automate dual gates, along with a safety photo eye for added protection. Compatible with both solar and AC power, the 300D offers smooth operation, fast installation, and rugged reliability for gates up to 20 feet each.
Key Features:
- Complete dual swing gate operator kit with photo eye
- Supports gates up to 20 feet and 800 pounds each
- Compatible with solar and AC power sources
- Includes two Sentry actuators, control board, and mounting hardware
- Photo eye sensor for enhanced safety and UL325 compliance
- Battery-powered for continued operation during power outages
- Plug-and-play wiring for simple installation
- Perfect for driveways, ranch gates, and light commercial use
Complete Installation Guide for the Sentry Gate Opener
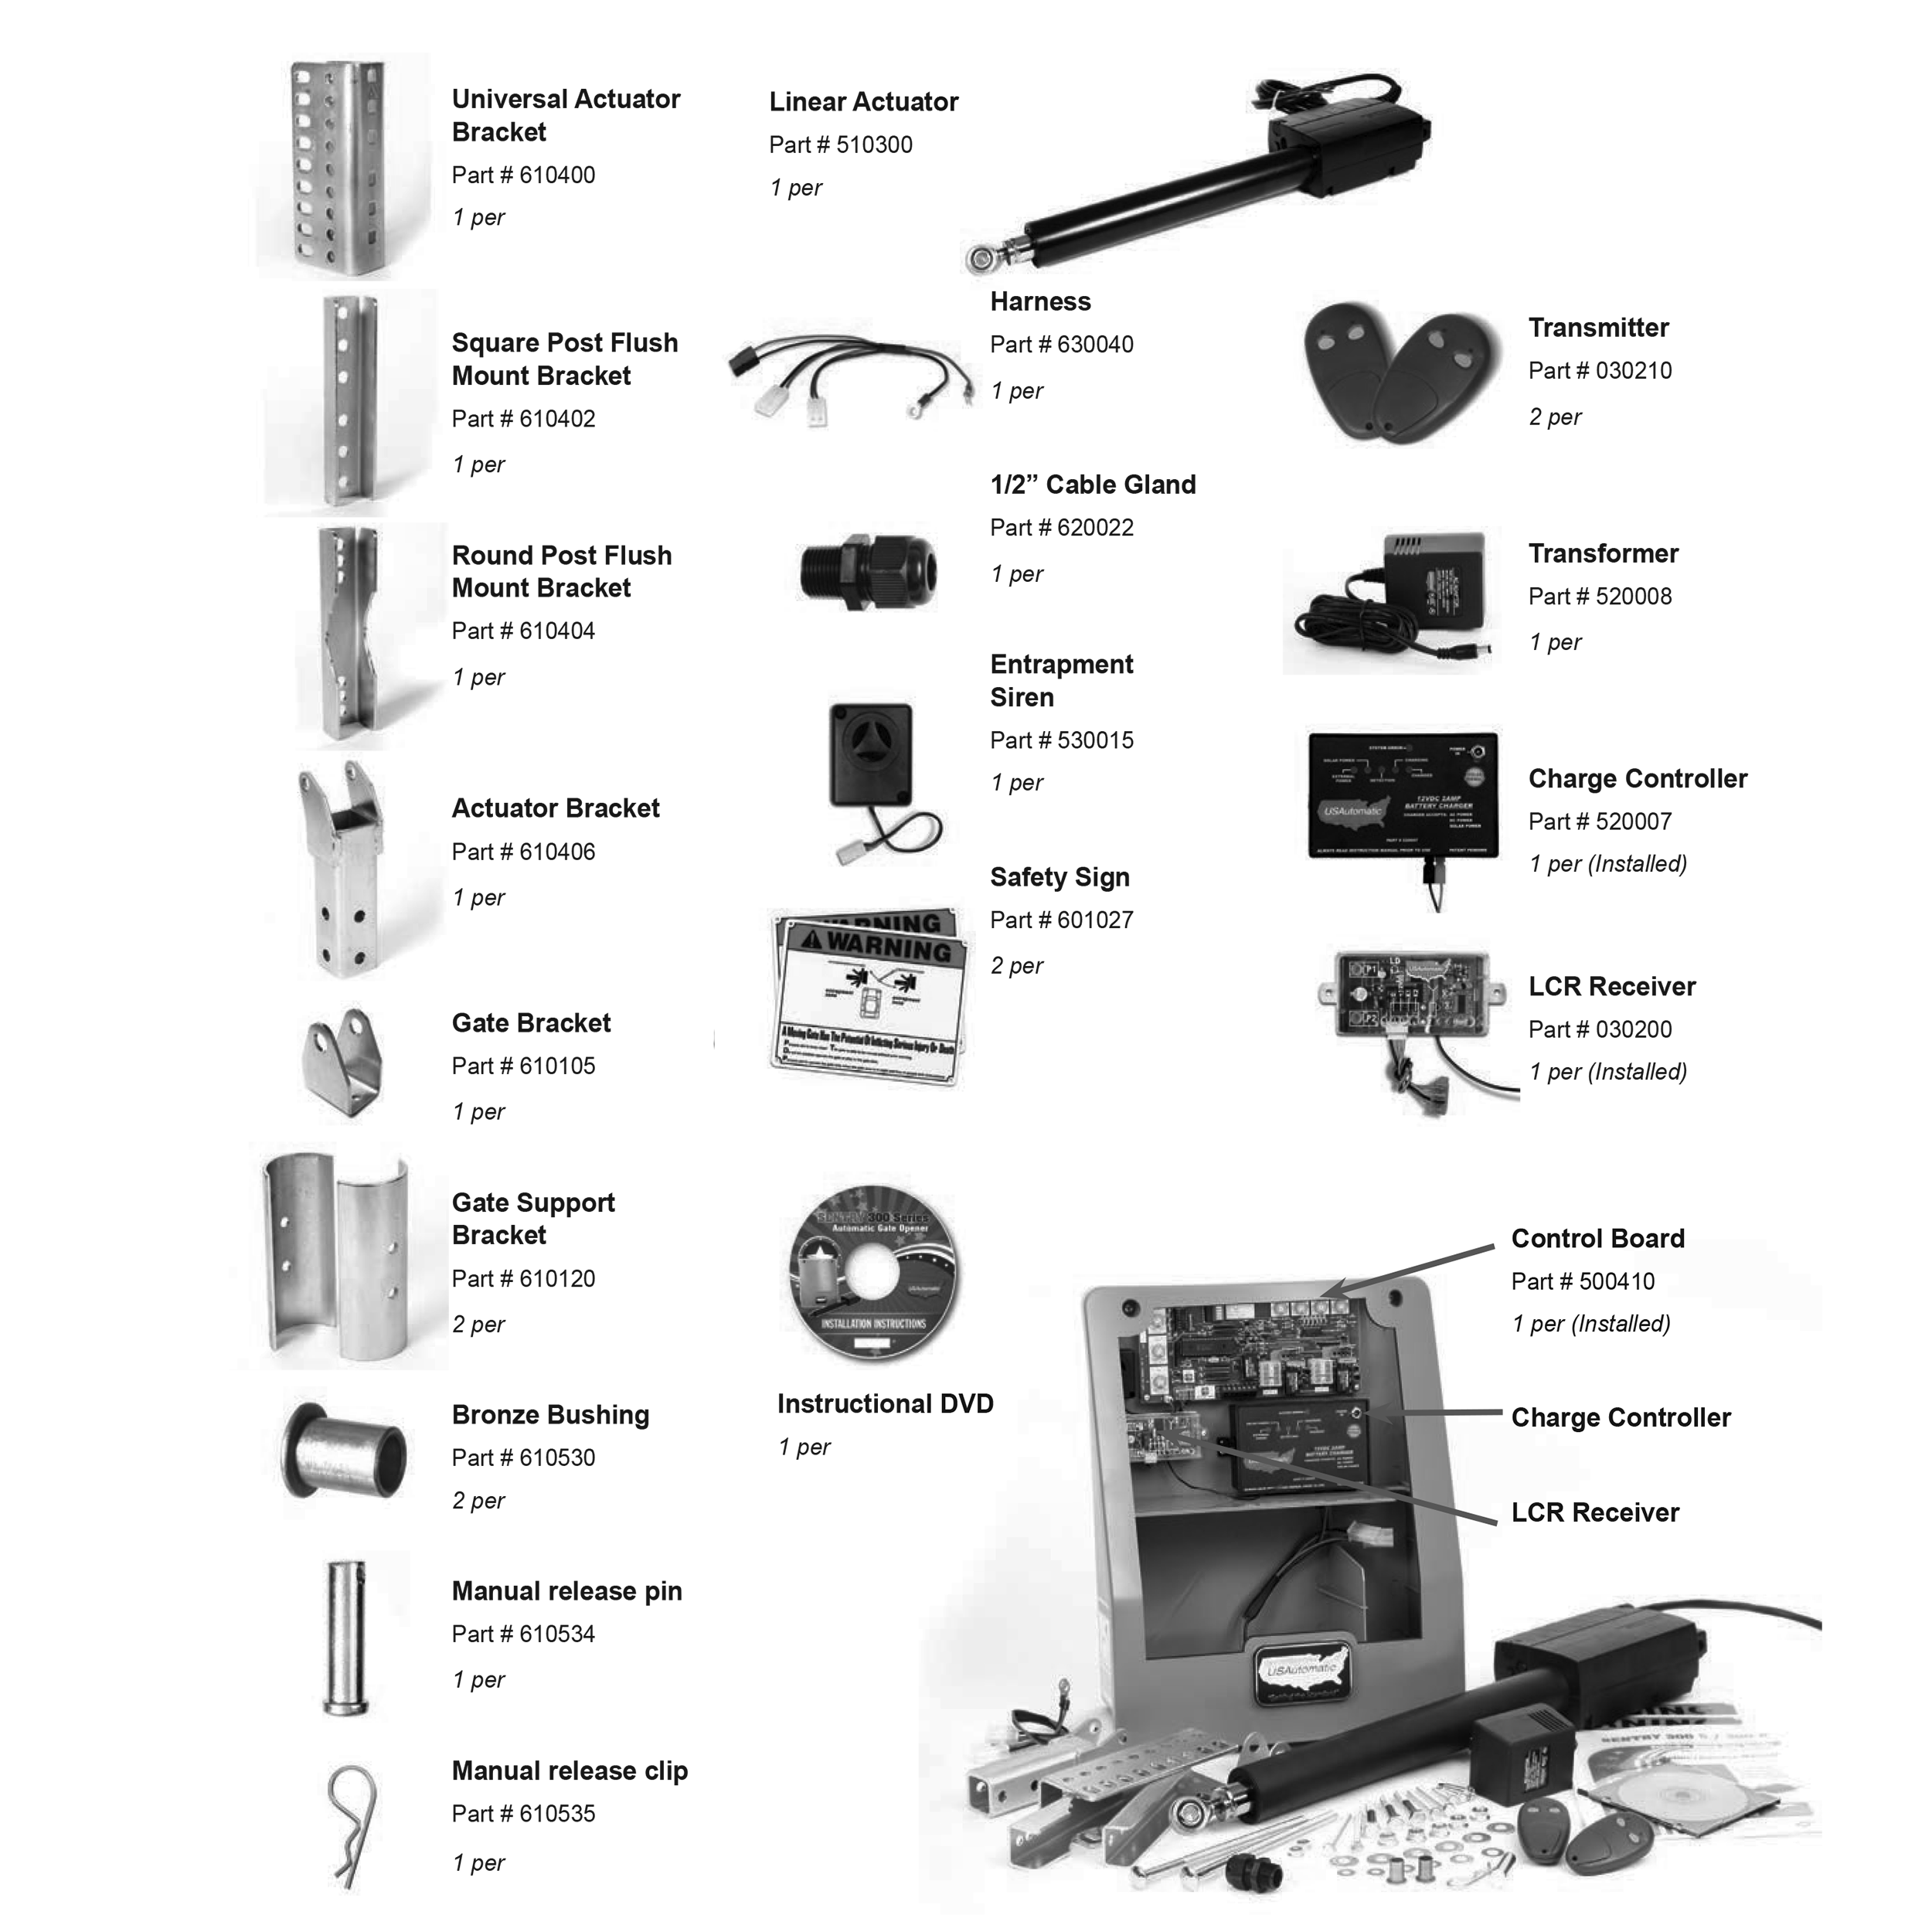
Parts and Hardware Checklist
Ensure that all parts and hardware are available before starting. A complete list includes:
Primary Components:
- Linear Actuator (Part #510300)
- Control Board (Pre-installed, Part #500410)
- Plug N Go Harness (Part #630040)
- Charge Controller (Pre-installed, Part #520007)
- LCR Receiver (Pre-installed, Part #030200)
- Transmitters x2 (Part #030210)
- Transformer (Part #520008)
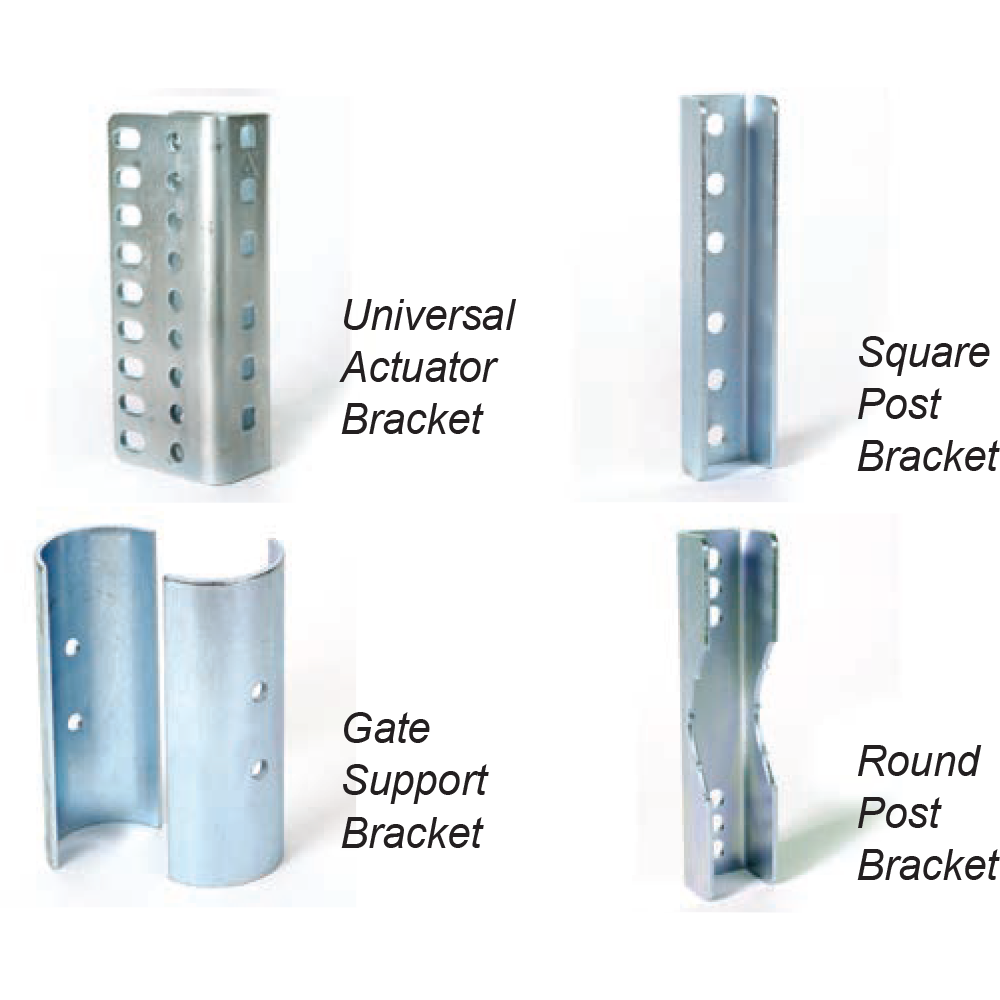
Brackets and Mounts:
- Universal Actuator Bracket (#610400)
- Square Post Flush Mount Bracket (#610402)
- Round Post Flush Mount Bracket (#610404)
- Actuator Bracket (#610406)
- Gate Bracket (#610105)
- Gate Support Bracket (#610120) x2
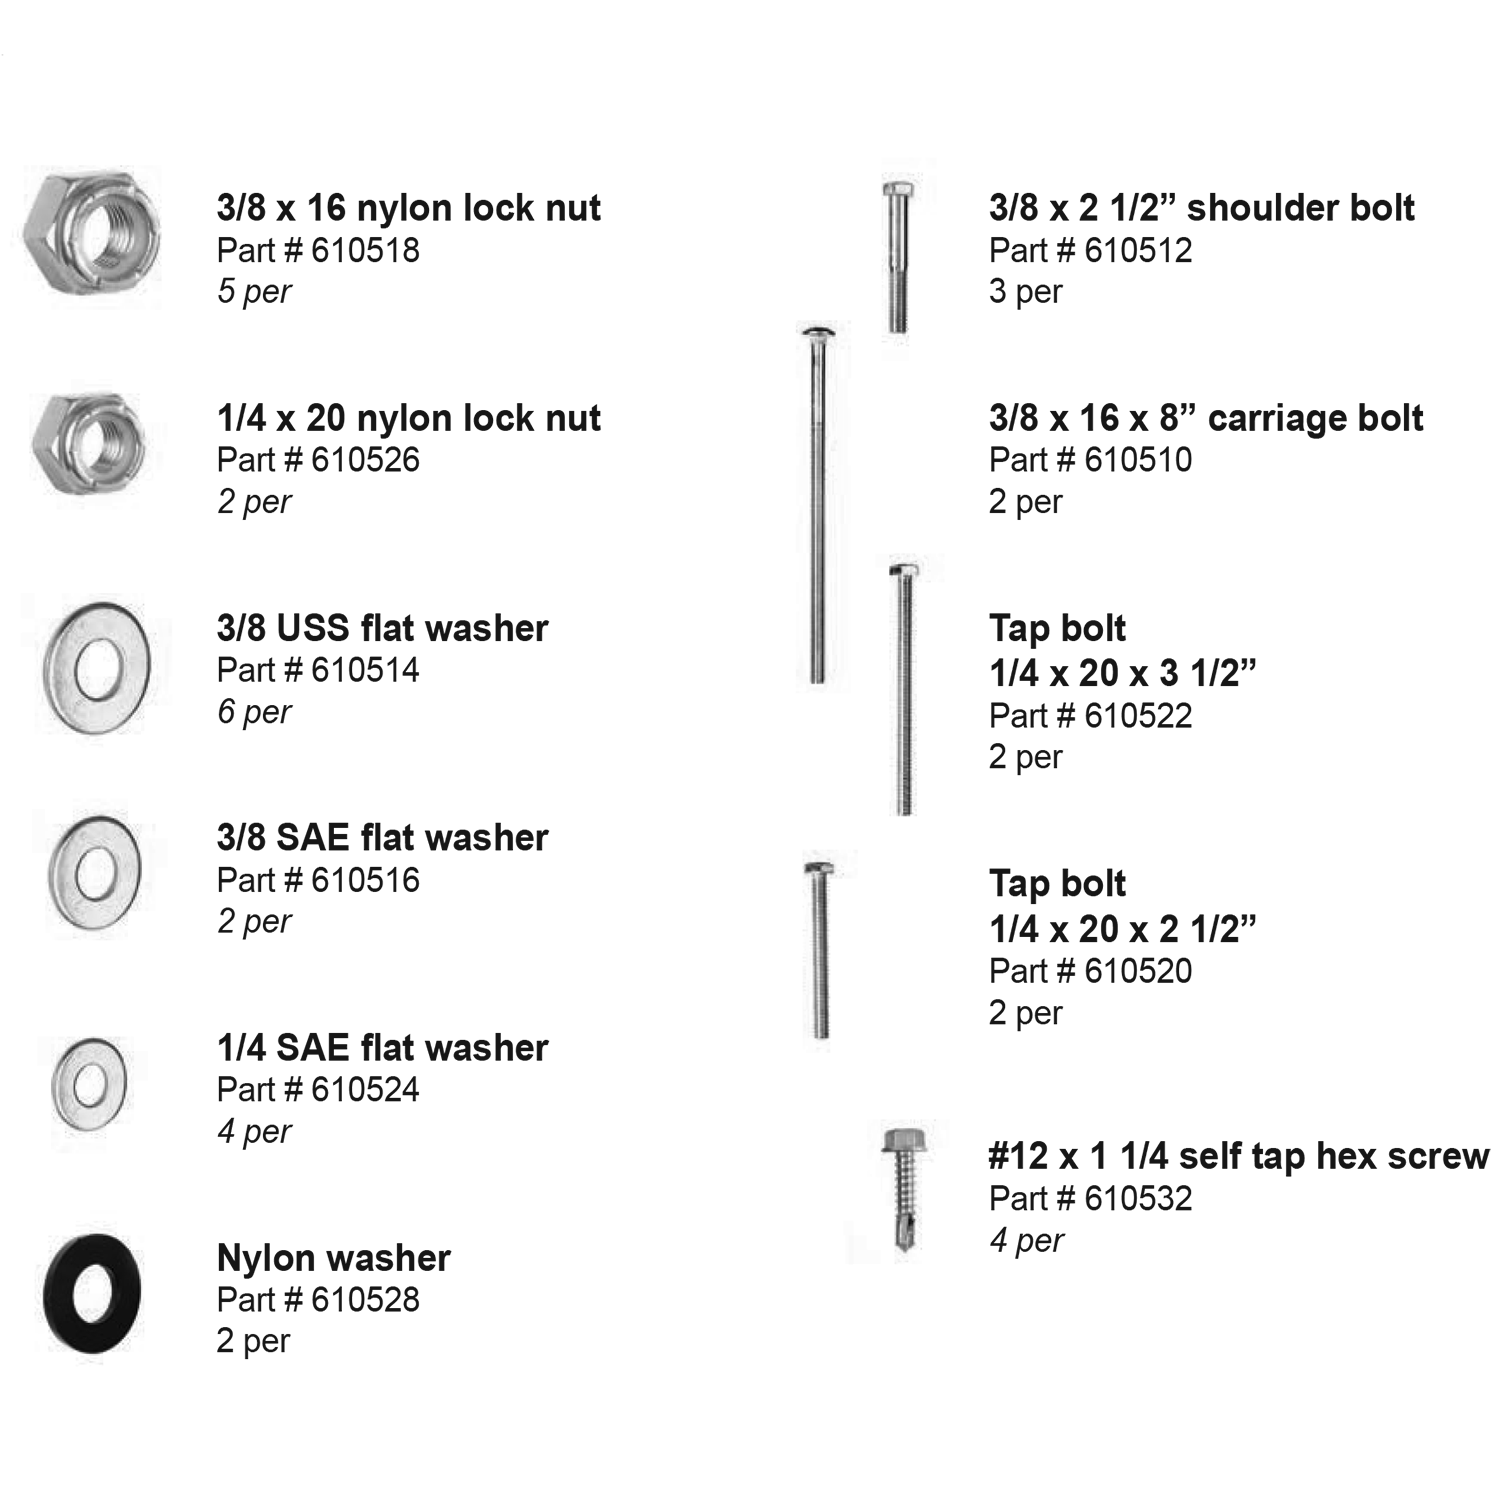
Fasteners:
- 3/8 x 16 nylon lock nut (#610518) - 5 Total
- 1/4 x 20 nylon lock nut (#610526) - 2 Total
- 3/8 USS flat washer (#610514) - 6 Total
- 3/8 SAE flat washer (#610516) - 2 Total
- 1/4 SAE flat washer (#610524) - 4 Total
- Nylon washer (#610528) - 2 Total
- 3/8 x 2.5" shoulder bolt (#610512) - 3 Total
- 3/8 x 16 x 8" carriage bolt (#610510) - 2 Total
- 1/4 x 20 x 3.5" tap bolt (#610522) - 2 Total
- 1/4 x 20 x 2.5" tap bolt (#610520) - 2 Total
- #12 x 1.25" self-tap hex screw (#610532) - 4 Total
Miscellaneous:
- Entrapment Siren (#530015)
- Manual release pin and clip (#610534 & #610535)
- Safety Signs x2 (#601027)
- Instructional DVD (1 Total)
Shop Sentry Parts Shop Sentry Accessories
Gate Compatibility and Site Considerations
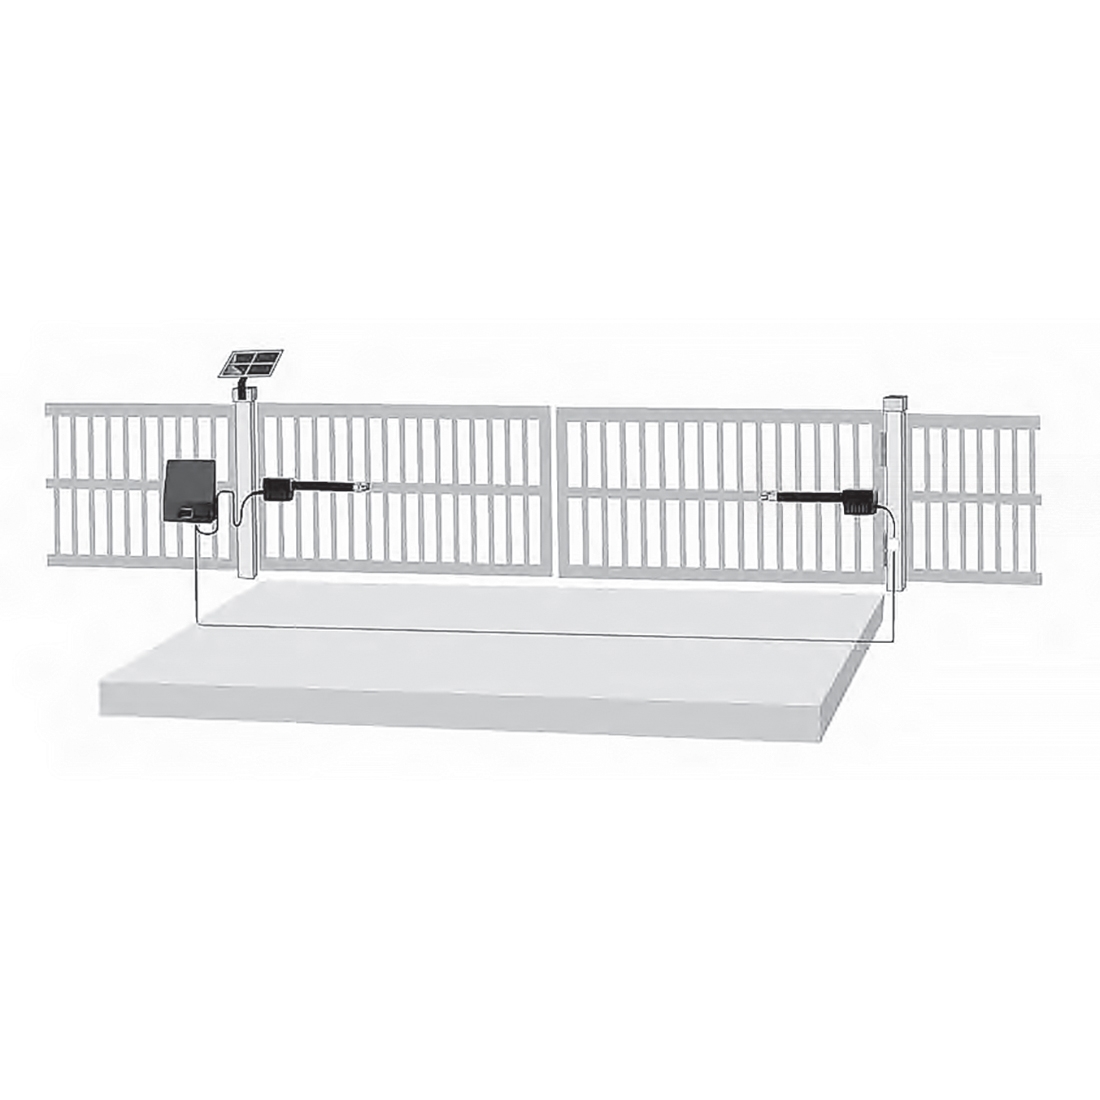
Before installation, verify that the gate and site conditions are suitable for the Sentry Gate Opener. The opener is designed for vehicular Class I-IV swing gates up to 20 feet long and 400 pounds in weight. The system comes with mounting hardware suitable for hinge posts between 2 3/8" and 6" in diameter. Gate types that work best with the system include chain link, farm, ranch, and ornamental iron gates, each with specific maximum lengths and weights. The opener is not intended to compensate for poor gate design. Gates must be structurally sound, swing freely, and use bearing-type hinges to minimize resistance. Wheels used to support the gate often indicate underlying structural weaknesses and can hinder proper operation.
Carefully review the installation site. Ensure there is adequate space for installing the control box and maintaining it. Plan where brackets will be attached on both the gate and the hinge post. Consider the direction in which the gate will open—either pulling inward or pushing outward—and whether the actuator will be powered via AC or solar charging. Solar panels should be installed in a location with maximum sun exposure, typically facing south or southwest.
Installation Steps
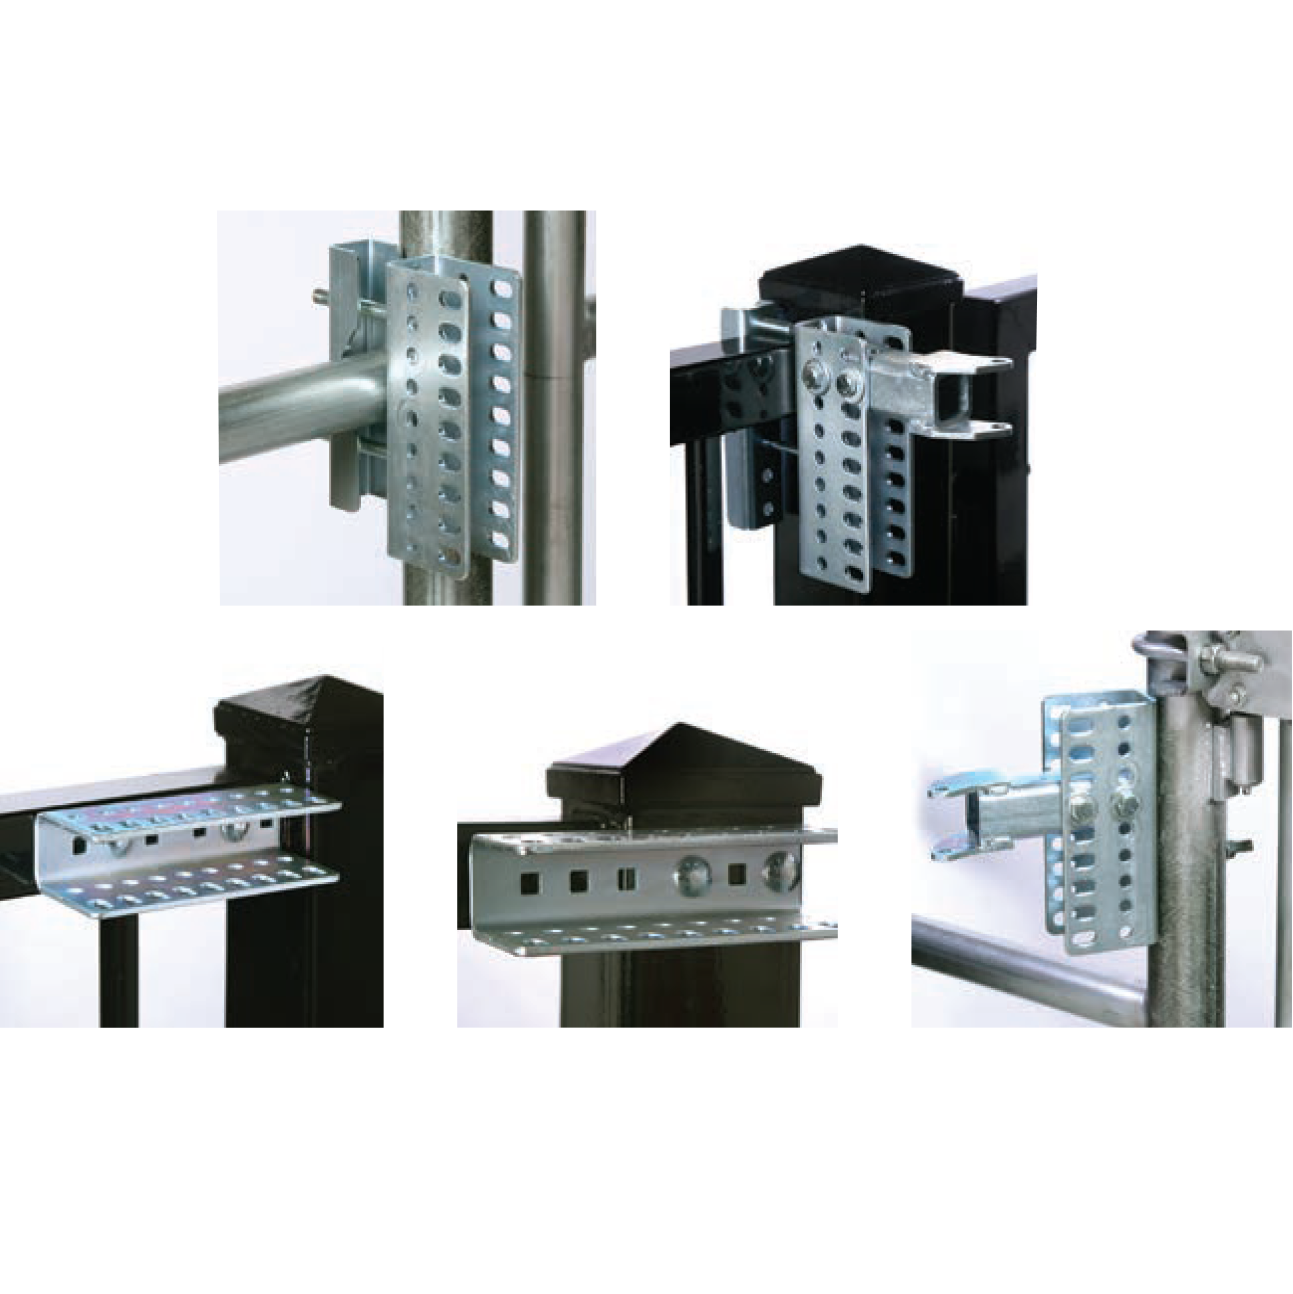
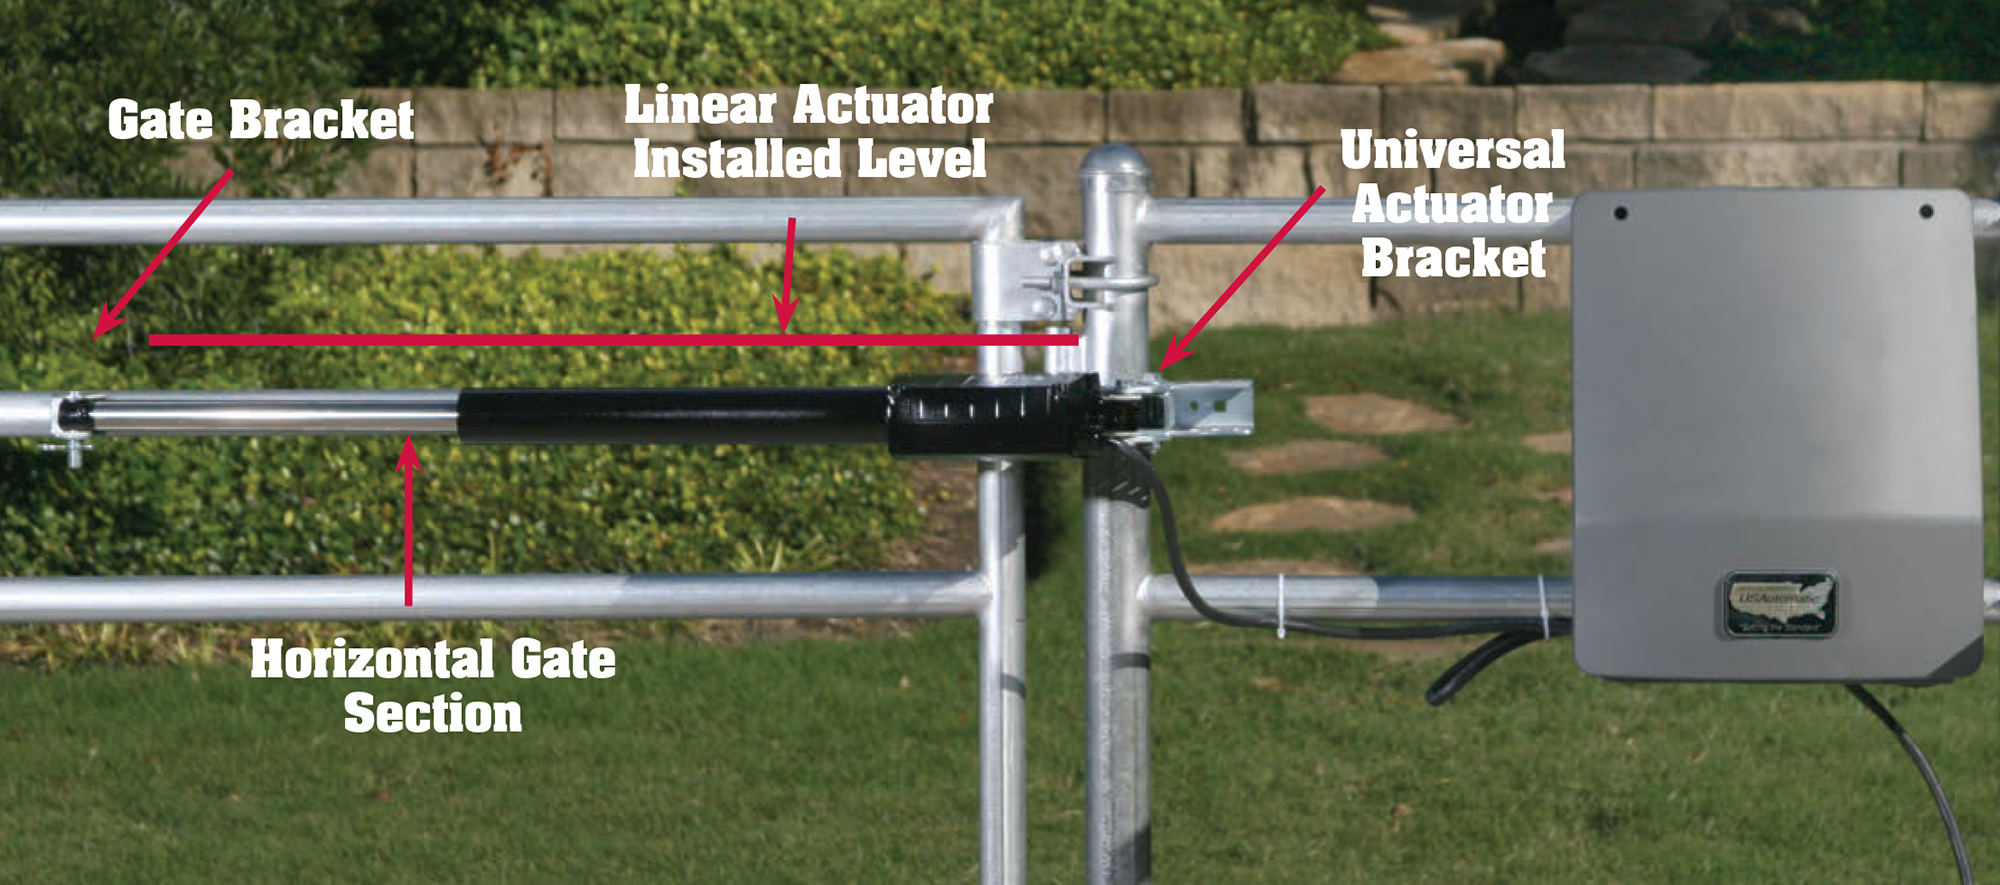
Step 1: Attach the Universal Actuator Bracket
Use the appropriate flush mount bracket (square or round post) and securely fasten the universal actuator bracket with 3/8" carriage bolts, washers, and lock nuts. For optimal strength, drill through the post.
Step 2: Attach Actuator Bracket to Universal Actuator Bracket
Secure the actuator bracket to the universal bracket using 3/8" shoulder bolts and nylon lock nuts. Position the pivot hole at the correct offset depending on whether the gate is Pull to Open or Push to Open.
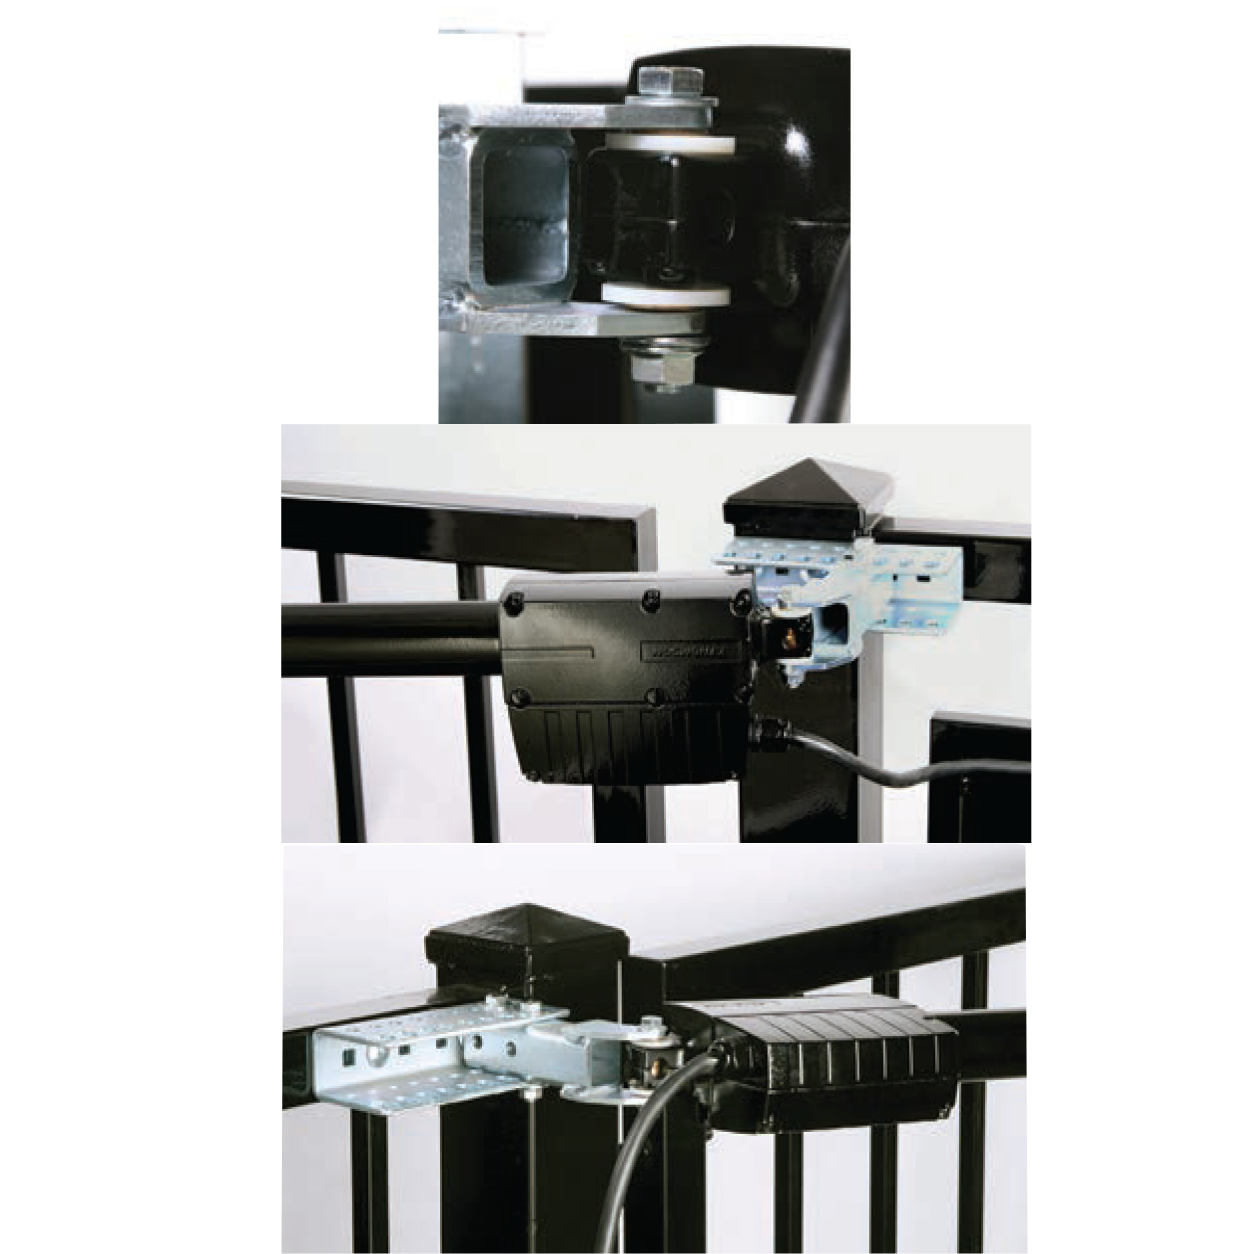
Step 3: Install Linear Actuator to Actuator Bracket
Insert nylon washers and bronze bushings into the rear of the actuator. Use a shoulder bolt and lock nut to attach the actuator to the actuator bracket. Do not overtighten—ensure it pivots smoothly.
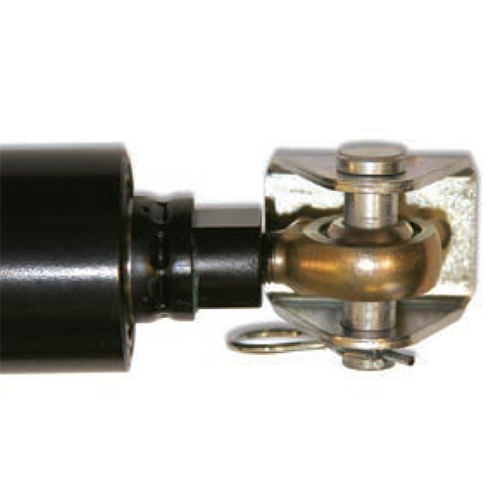
Step 4: Install Gate Bracket to Linear Actuator and Gate
With the gate in its fully open position, swing the actuator out level and mark the attachment point. Attach the gate bracket using the appropriate tap bolts and lock nuts. Attach the actuator to the bracket with the manual release pin and clip.
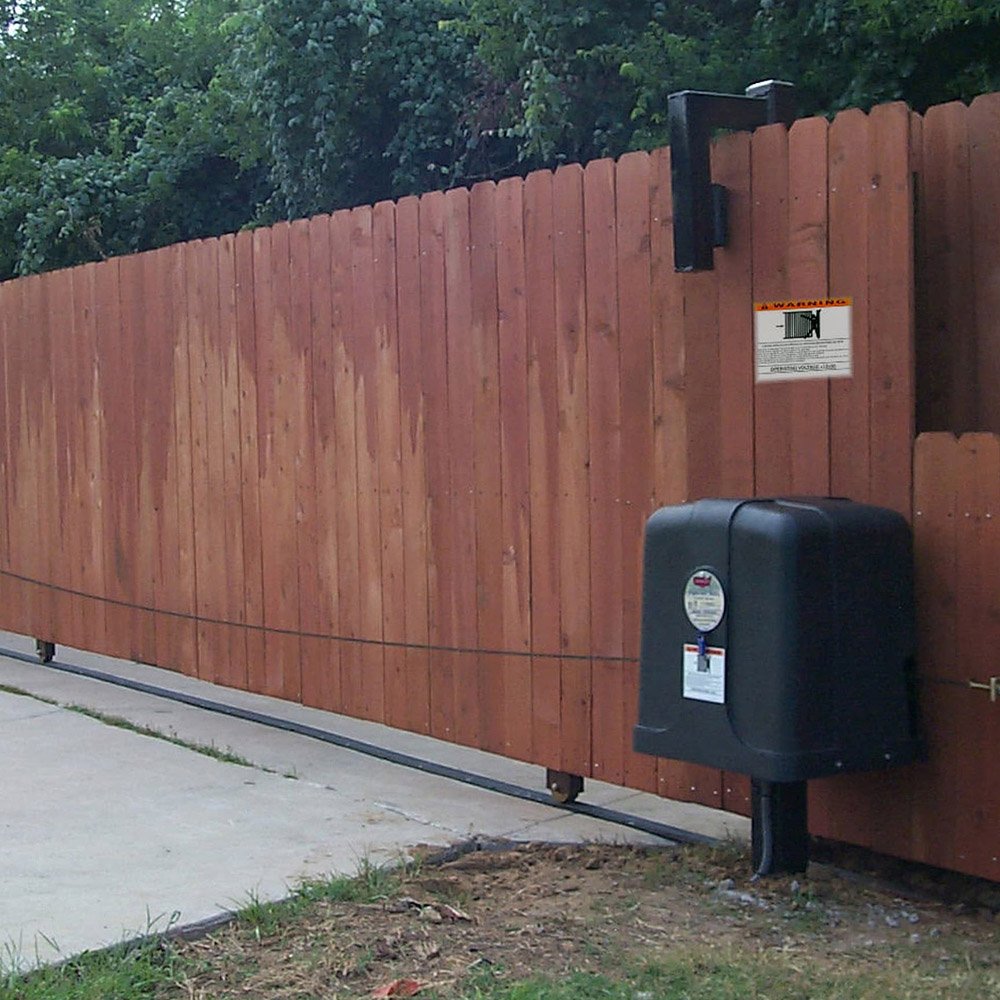
Step 5: Prepare and Install the Control Box
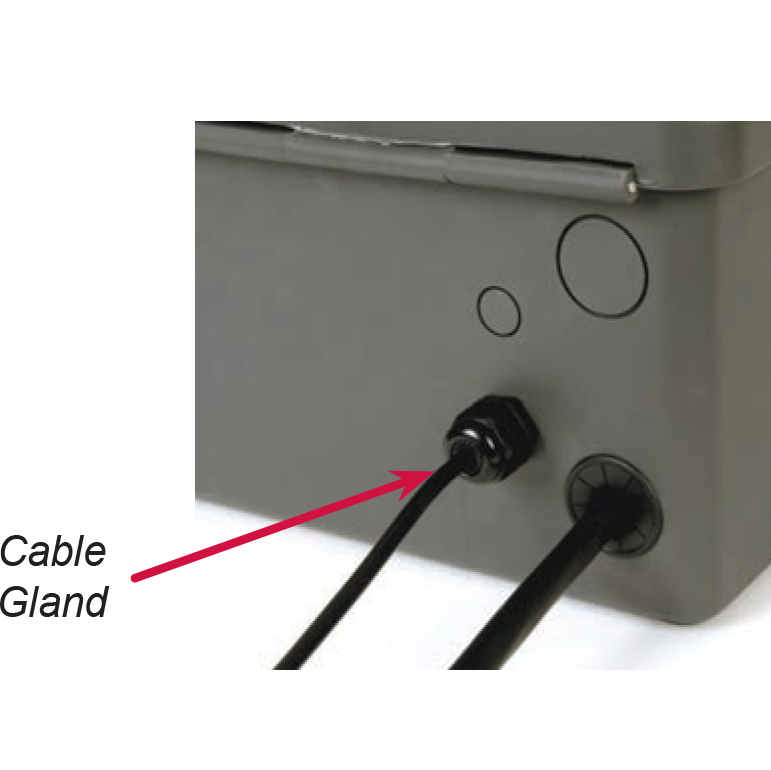
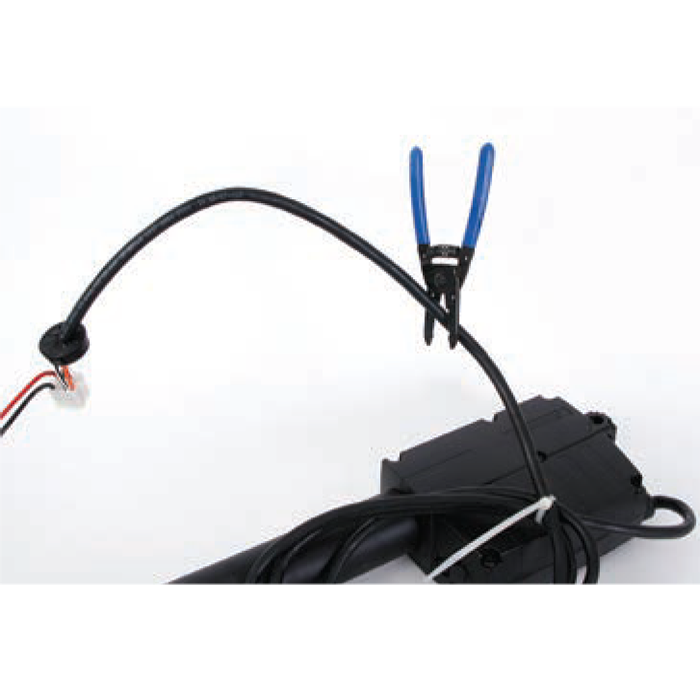
Use the control box as a template to mark mounting screw holes. Install using four #12 hex screws. The cable gland goes in the smaller bottom hole for charge devices; the larger hole is for the actuator cable.
Step 6: Splice Actuator Cable if Required
If the 8-ft cable is not sufficient, splice using a 5-conductor cable matching the correct wire gauges. Use waterproof junction boxes and follow proper color coding to avoid malfunctions.
Step 7: Install Plug N Go Harness and Battery
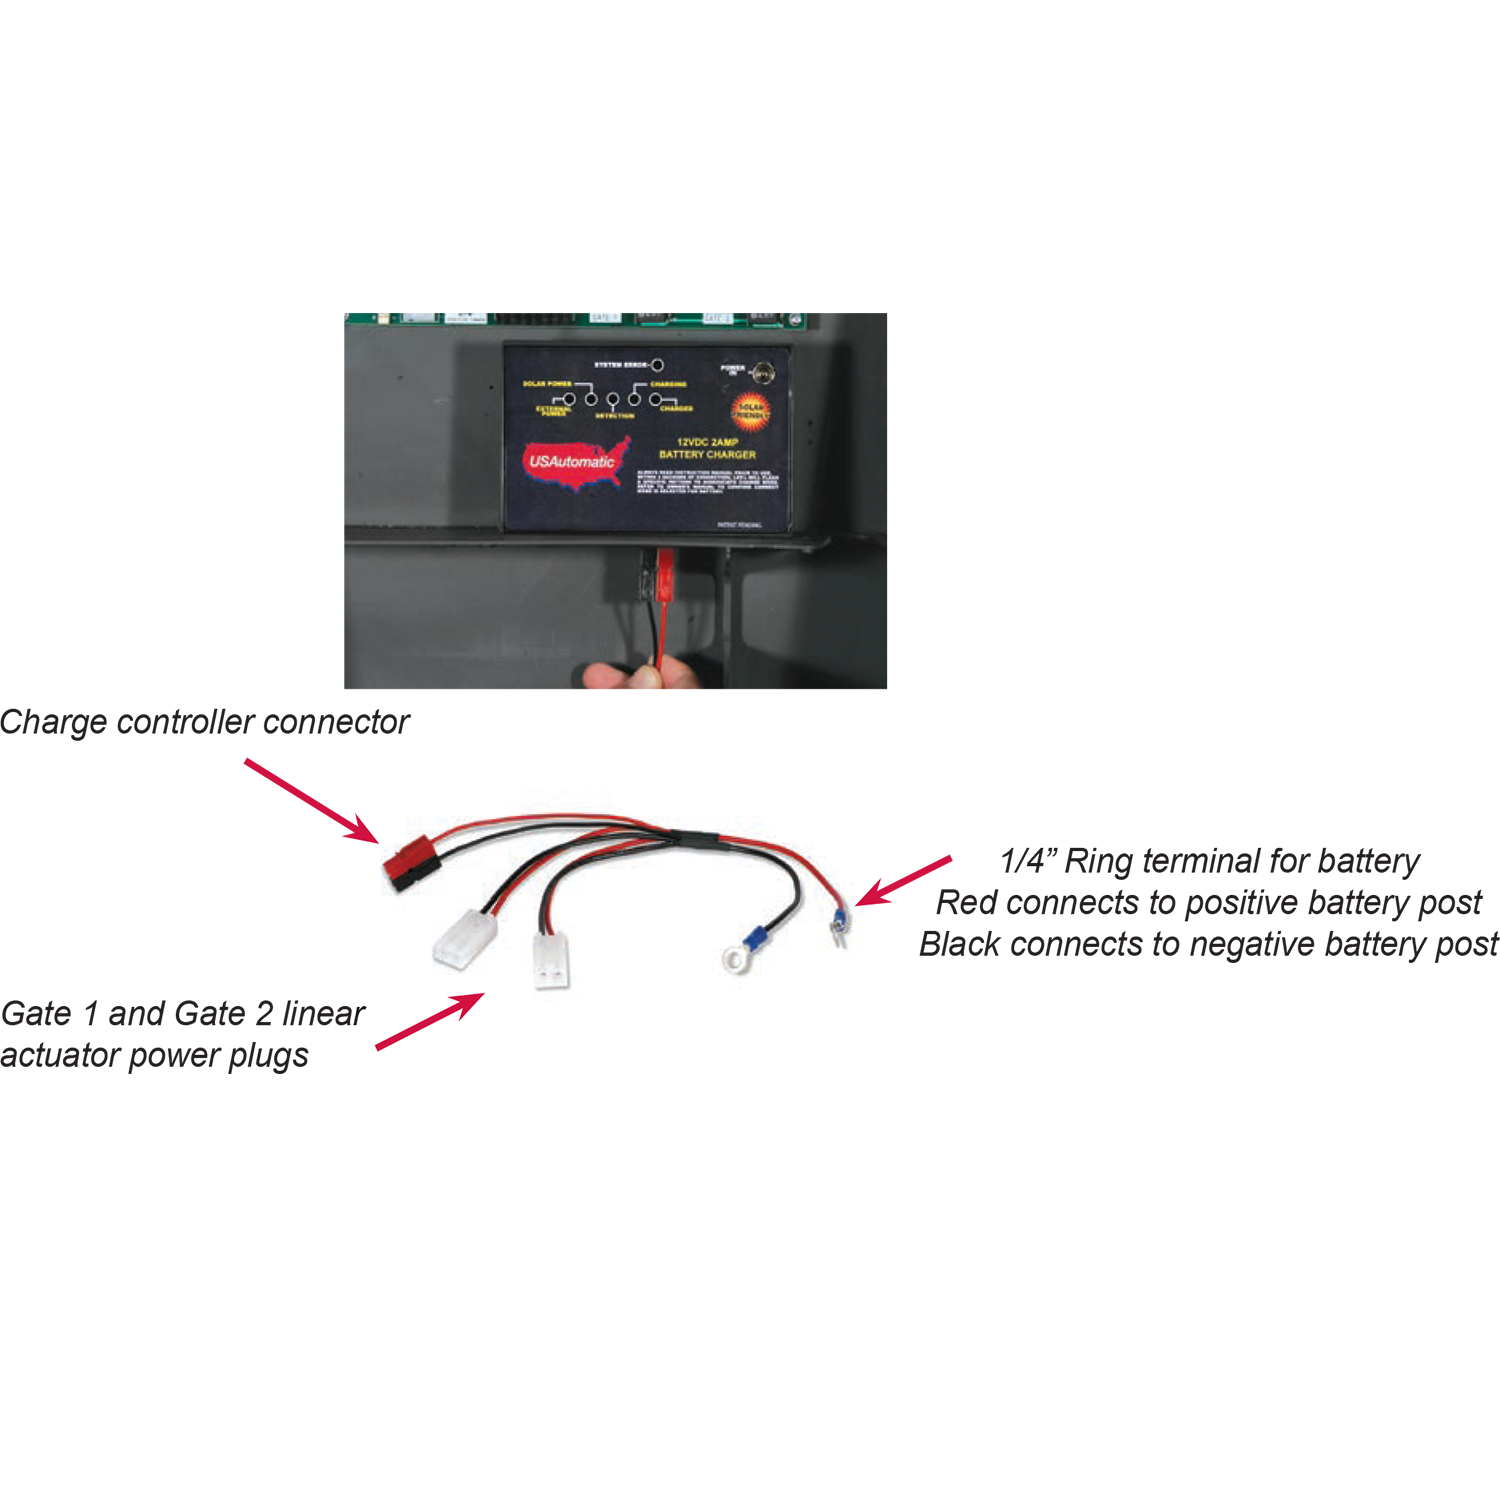
Connect the red wire to the battery’s positive terminal and the black wire to the negative. Use only sealed maintenance-free Group U-1 batteries with at least 30 amp-hours of capacity.
Step 8: Install Charging System (AC or Solar)
Route the transformer or solar panel cable into the control box through the gland. Plug into the charge controller’s "Power In" port. Ensure proper sunlight for solar installations.
Step 9: Connect All Cables
Plug the actuator’s power and control plugs into the designated Gate 1 ports on the control board. Route excess cable neatly inside the control box’s wire compartment.

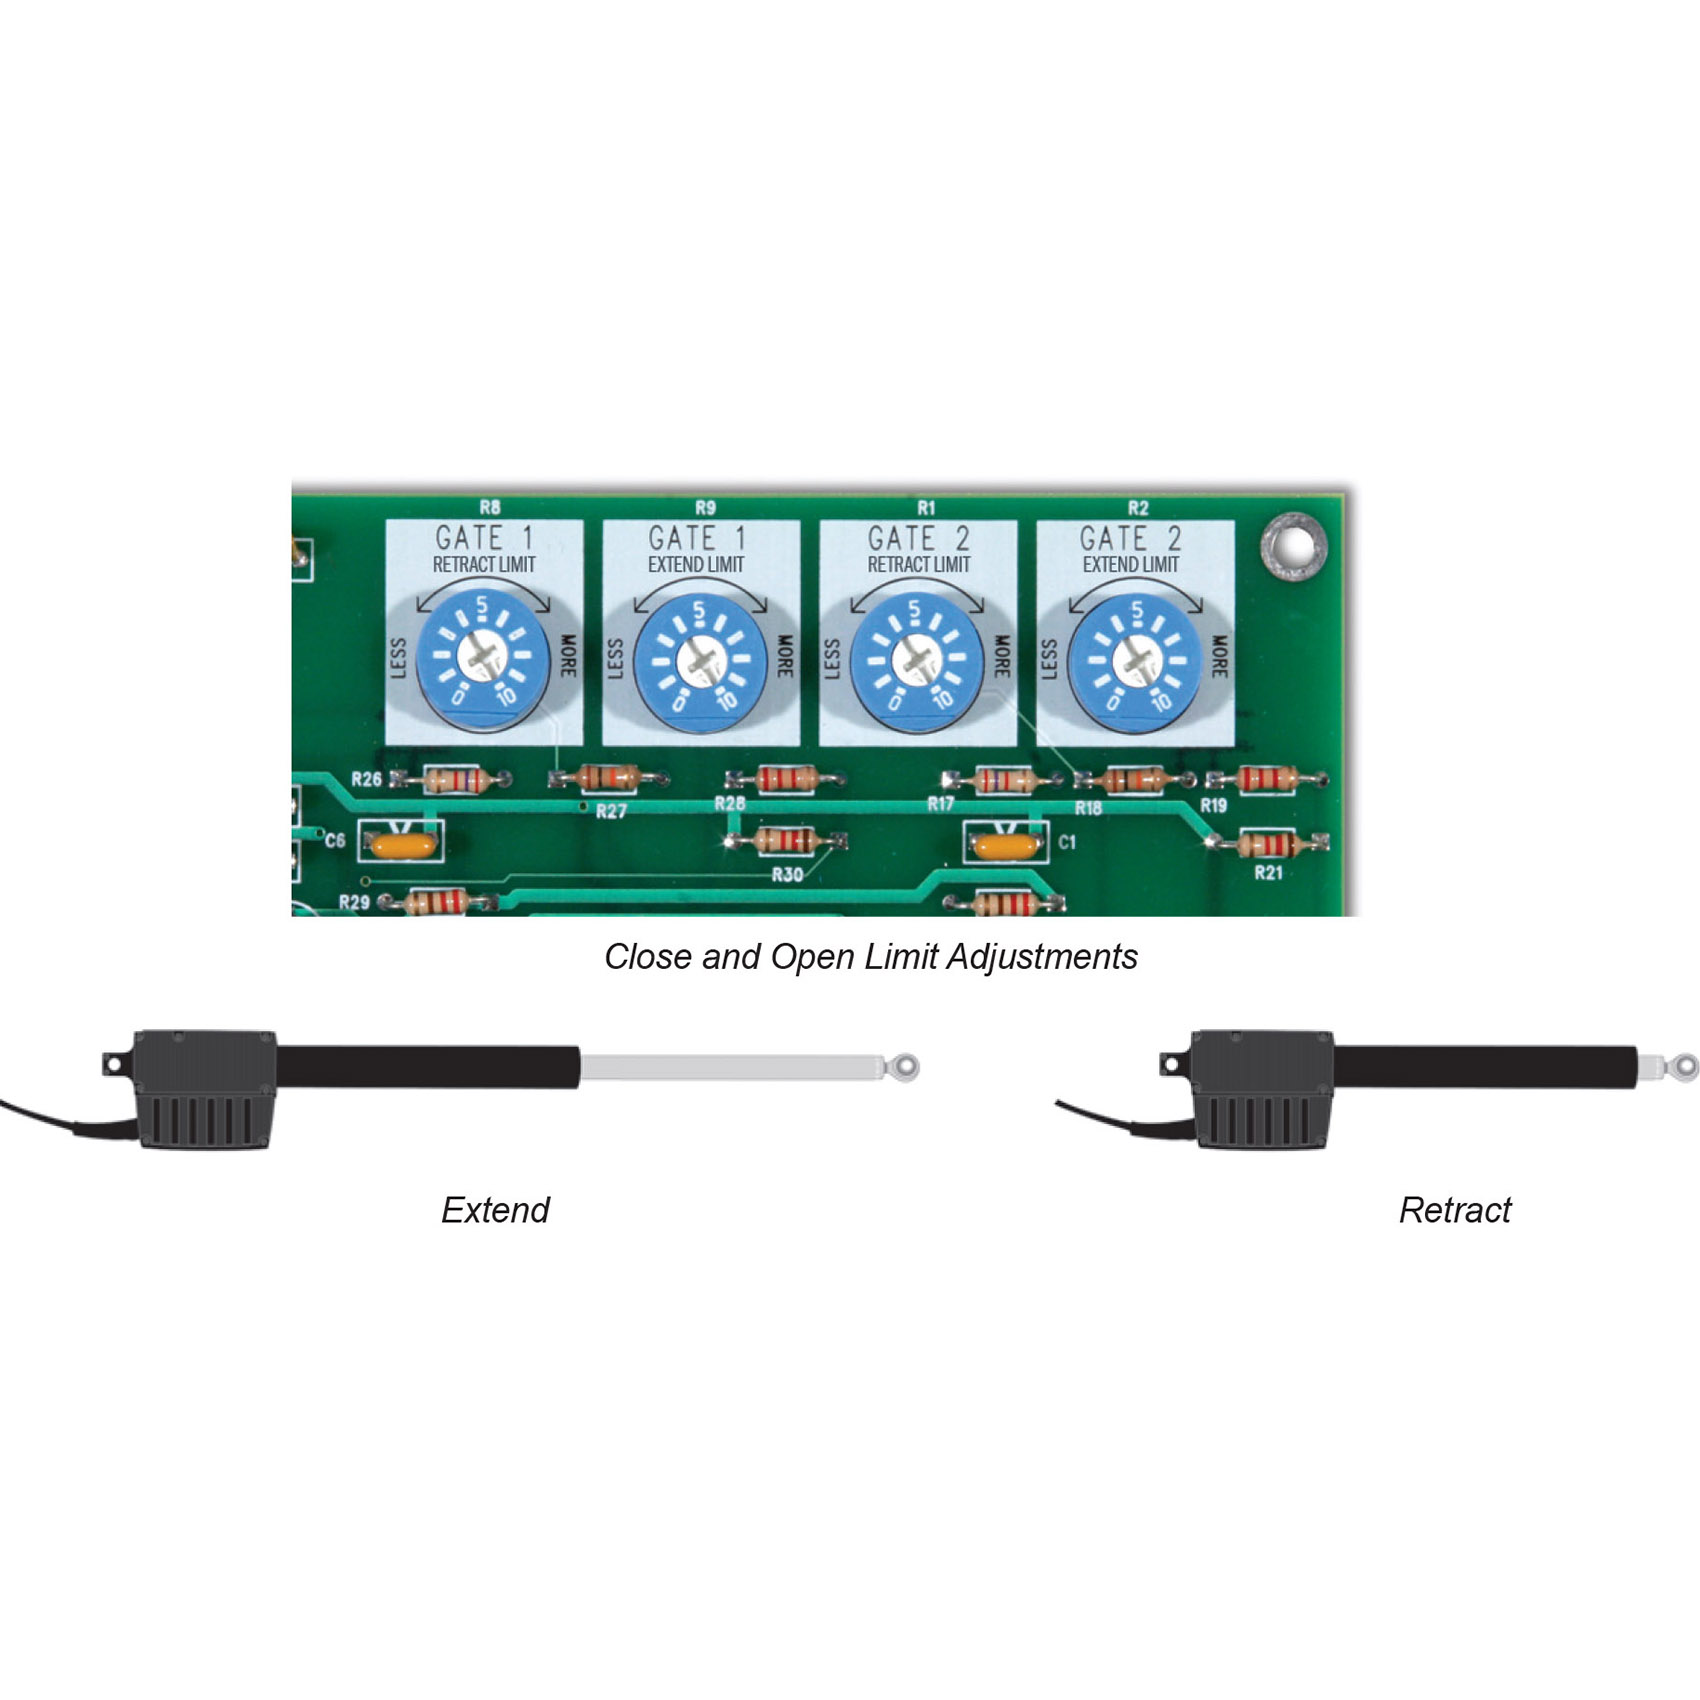
Step 10: Sensitivity and Limit Adjustments
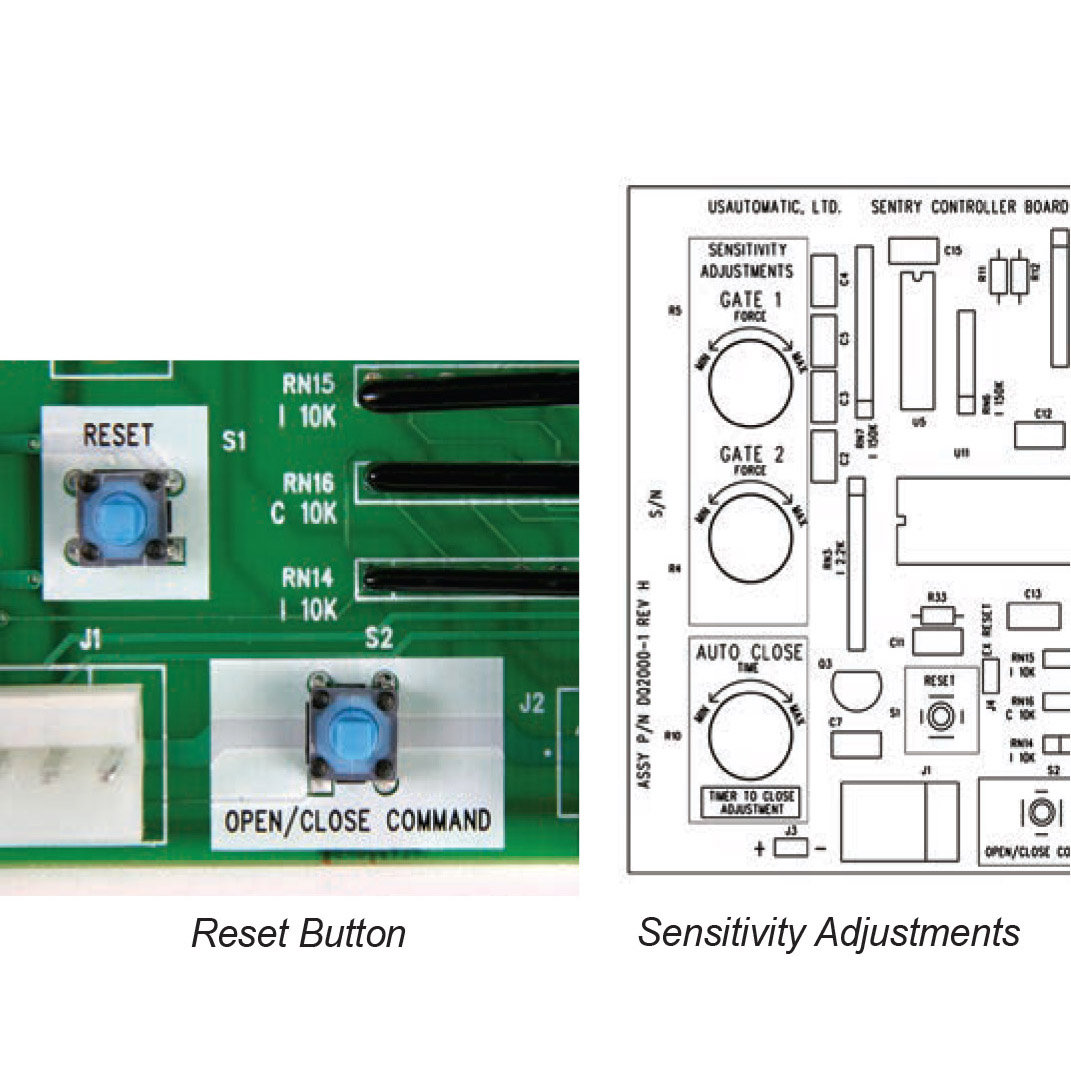
Adjust Gate 1 and Gate 2 sensitivity dials, initially set to position 5. Turn clockwise for more force and counterclockwise for less. Adjust open and close stop positions using the Extend and Retract limit dials.
Step 11: Test Operation and Finalize
Use the control board’s push button to test gate movement. Observe motion and adjust the limit positions for optimal opening and closing. Make incremental changes to fine-tune the gate’s stop points.
Step 12: Install Safety Signs and Program Transmitters
Install safety signs clearly on both sides of the gate. Change the default dipswitch codes on transmitters for security and follow the manual's procedure for pairing them with the receiver.
Safety Notes
Follow all safety precautions to reduce the risk of injury or property damage. Never allow children to operate or play near the gate. Pedestrians must have a separate entrance. Install safety devices such as photo eyes and safety edges where applicable.
The entrapment alarm will sound for five minutes if the gate encounters two consecutive obstructions. Disconnecting the actuator cable or pressing the reset button on the control board will stop the gate in an emergency. Ensure that control devices are mounted at least six feet away from the gate to prevent accidental activation.
Avoid sealing the control box completely to allow airflow for the battery. Regularly check that the box is clean and free from insect activity.
Maintenance Checklist
Maintaining the system is essential for long-term reliability. Perform the following checks regularly:
- Inspect battery terminals and clean with a baking soda solution if needed.
- Lubricate all hinge points and pivot mechanisms.
- Ensure all mounting hardware is secure and free of corrosion.
- Check weld points for cracks or structural issues.
- Verify that the control box remains clean, dry, and insect-free.
- Observe the gate’s opening and closing time; if significantly slower than 16 seconds, test or replace the battery.
- Test all safety features and secondary sensors at least once per month.
Contact Us
The Sentry 300D Dual Swing Gate Operator with Photo Eye Kit offers a complete, reliable solution for automating your dual swing gates. With support for solar or AC power, rugged components, and easy installation, it's built for lasting performance in residential and light commercial settings. Safety and convenience are at the core of this system, thanks to UL325 compliance and multiple access control options. Whether you're upgrading an existing gate or planning a new installation, the Sentry 300D is engineered to meet your access needs with confidence. Our knowledgeable team is here to help you find the right configuration, accessories, and support. Reach out today for expert advice, personalized recommendations, and answers to any questions you have about this product or your gate automation project.
Contact Us