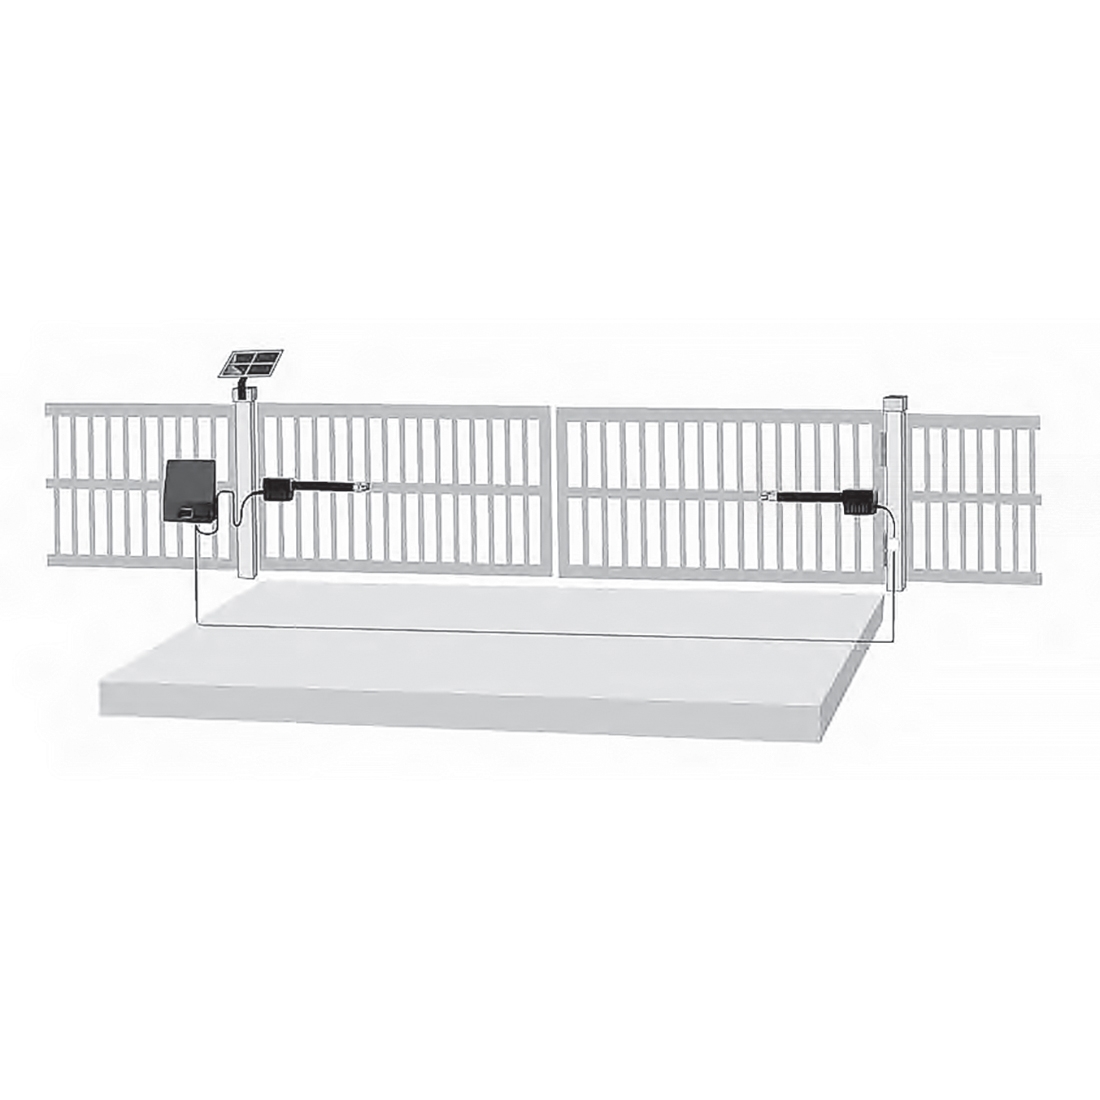
8 Steps to Splice USAutomatic Linear Actuator Cables for Dual Gate Systems
Splicing an actuator cable is done when you require an extension cable or wire two dual gate opener system actuators. So, whether you have a single gate opener system but cannot install the control box close enough to the actuator or need to wire two actuators to the control box USAutomatic Gate Openers has simple and detailed instructions. Note: Both the Ranger and Patriot Dual Swing Gate Openers include 40 ft of extension cable. If the distance between the junction box and the control box exceeds this distance, it is recommended that you purchase a cable that does not require splicing. Do Not make underground splices, as moisture can cause system damage.
How to Splice Linear Actuator Cables
- Locate the 8-pin connector of the linear actuator. Measure 18 inches from the connector end and trim the black jacket to expose the wires.
- Save the 8-pin connector and pigtail cable for Step 8.
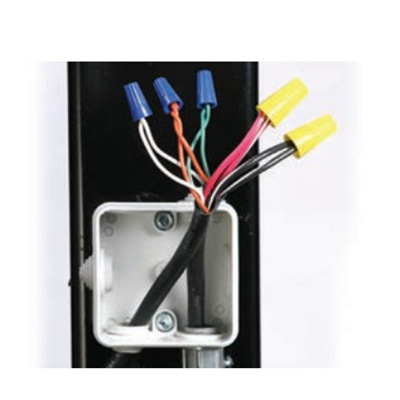
- Install a rain-tight junction box on the Gate 2 hinge post below or near the actuator.
- Route the extension cable from the junction box at Gate 2 through the bottom of the control box. Trim as needed for future use and ease of servicing.
- Remove 2 inches of the exterior black jacket on both cables routed into the junction box and strip the jacket of each colored wire 1/2 inch.
- Match and connect matching colored wires with a wire nut. Test connections by pulling on the wires.
- Press all wire connections into the junction box and install the rain-tight cover.
- Connect the pigtail cable to the remaining end of the extension cable within the control box. Strip back excess installation jacketing from wires as needed and match and connect colored wires with wire nuts. Check wire connections and do NOT plug in the control board.
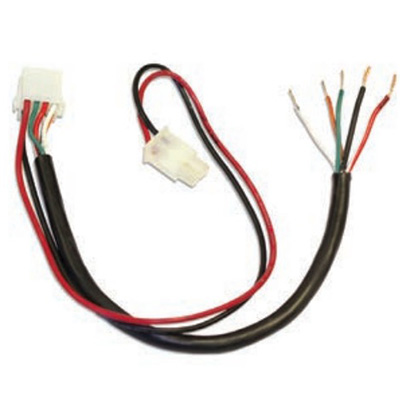
USAutomatic Linear Actuator Cable Splicing
USAutomatic Linear Actuator Cable Connections
Now that you have wired your actuator arms to the control board, you may begin installing your safety devices.
For previous instructions for USAutomatic linear actuator arm installation, check out the following articles.
- How to Install USAutomatic Linear Actuator to Mounting Bracket
- How to Install USAutomatic Linear Actuator to Gate Bracket
- How to Connect USAutomatic Linear Actuator Cable to the Control Box
For further information about USAutomatic products, packages, and replacement parts, please get in touch with our friendly sales representatives. They are happy to help in any way they can!
Contact Us