


USAutomatic Patriot Swing Gate Opener - Open and Close Stop Positions Keep Changing
The automatic close feature depends on proper dipswitch settings and limit switch configuration. DS1 switch 1 must be ON for auto-close to function. If DS1 switch 2 is OFF, the gate should automatically close from any position. If switch 2 is also ON, the gate will auto-close only when the "Retract Limit" LED (or both open limit LEDs for dual gates) is on.
Diagnostic Steps
Step 1: Test Manual Close
Locate the Open/Close Command push button and press it to verify that the gate closes. If the gate closes correctly, proceed with the steps below.
Step 2: Verify DS1 Switch 1
Verify that DS1 switch 1 is ON. If not, turn it on and recheck gate operation. If the gate remains open, continue to Step 3.
Step 3: Check Single Gate Switch Configuration
For single gate installations, only DS1 switch 3 OR 4 can be ON—not both. If both are on, the gate will not automatically close. Turn off the unused switch and recheck the operation.
Step 4: Check Limit Switch Status
Press and hold the LED Indicator button and observe the LEDs located just below the Gate 1 and Gate 2 (X1, X2) actuator plugs. Note which LEDs are on.
Limit Switch LED Guide:
- Left LED on: Gate should be in retracted (open) position
- Right LED on: Gate should be in extended (closed) position
If the LED for the retract position is not on when the actuator is fully retracted, the auto close will not work. The limit switches need to be adjusted.
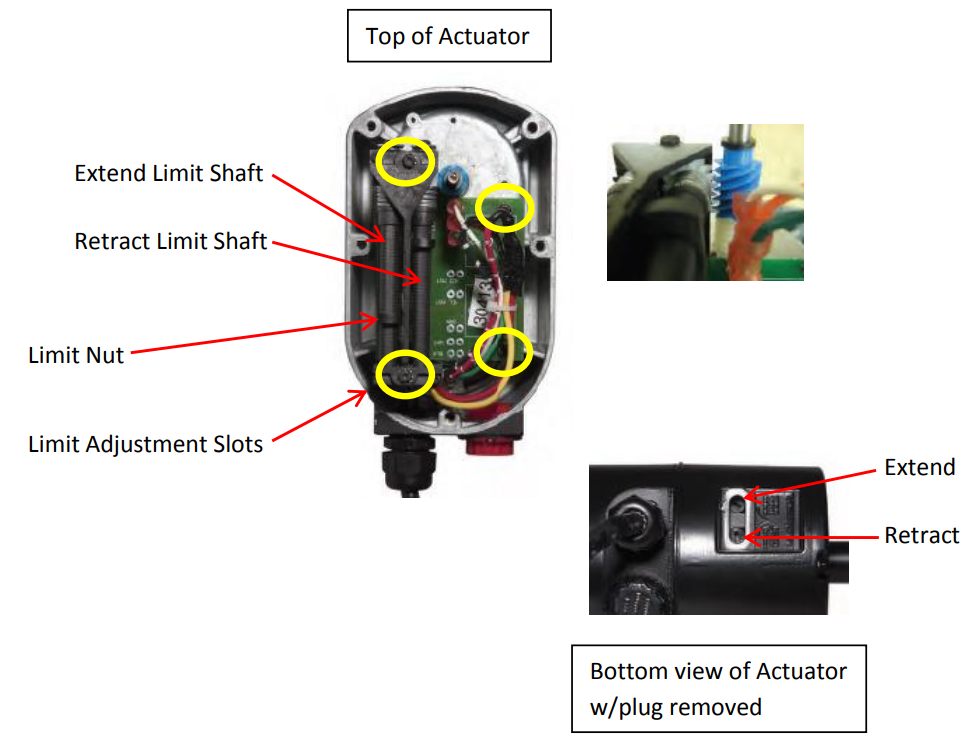
Step 5: Check J2 Connector Accessories
Press and hold the LED Indicator button and inspect the LEDs in the lower left corner of the control board. Note which LEDs are on.
If any LEDs are on:
- Disconnect the green J2 connector from the control board
- Press the Open/Close Command button to close the gate
- Press again to open the gate fully and verify automatic close is working
If the gate automatically closes correctly with J2 disconnected, the accessory connected to the J2 connector that was showing an activated LED needs to be repaired.
Step 6: Verify Entrapment Devices
Ensure all entrapment devices (photo eyes, contact edges) are connected and working properly. Faulty or misaligned safety devices can prevent automatic operation.